Pages

Wednesday, October 29, 2014

Pumpkin Chocolate Chip Muffins

The fall season is here! Well, in AZ it i still 95 degrees during the day so it doesn't really feel like fall, but the nights are cooler so that counts! Like many others, fall time makes me want all my pumpkin flavors and smells...pumpkin spice latte from Starbucks, the smell of pumpkin candles and the pumpkin hand soaps and wallflower plugins from Bath and Body Works!

My friend Jillian brought in these yummy little pumpkin muffins to work one day and I tried one. They were so fantastic that I had to ask her for the recipe! I made a batch of these and they were gone in 2 days! My niece came into town for 4 weeks and we made a total of 3 batches while she was here! So yummy! Thanks Jillian!!

This one is pretty easy to make and you can make these gluten free if you substitute the all purpose flour for a Gluten free version.

I think this recipe falls into the category of things I will look forward to every fall!!

Enjoy :)


Ingredients

1 1/2 cups all purpose flour (If you are Gluten Free, substitute with a Gluten Free flour)
1 teaspoon baking soda
1 teaspoon ground cinnamon
1/4 teaspoon ground ginger
1/4 teaspoon ground cloves
1/4 teaspoon freshly ground nutmeg
1/2 teaspoon salt
1/2 cup unsalted butter, room temperature
1 cup granulated white sugar
2 large eggs
1 teaspoon pure vanilla extract
3/4 cup solid packed, canned pumpkin puree
1 cup semisweet chocolate chips
Directions

  • Preheat oven to 350 degrees. Place rack in the middle of the oven. Line 12 muffin cups with paper liners.
  • In a large bowl, mix together the flour, baking soda, ground spices, and salt. 
  • In the bowl of your electric mixer, or with a hand mixer, cream the butter and sugar until light and fluffy. Add the eggs, one at a time, beating well after each addition. Beat in the vanilla extract. Scrape down the sides of the bowl. With the mixer on low speed, alternately add the flour mixture and pumpkin puree, in three additions, beginning and ending with the flour mixture. Fold in the chocolate chips.   
  • Fill the muffin cups evenly to the top with the batter using a spoon or an ice cream scoop. Place in the oven and bake for about 18 -20 minutes, or until firm to the touch and a toothpick inserted in the center of one of the muffins comes out clean. Place on a wire rack to cool.
Makes 12 regular-sized muffins.


Wednesday, September 10, 2014

Rosemary Dijon Baked Chicken Breast

This is one of those recipes you will want to make when you don't really feel like putting a lot of effort into your meal, yet you want to eat a good and healthy meal. I found this one at Allrecipes180.com. I did re-name this recipe because their naming convention just wasn't doing it for me (sorry).

This one is really simple to make and it has such an amazing taste. I'm a HUGE fan of recipes with Dijon Mustard! This one always turns out really moist and my kids asked for seconds. This one pairs really well with mashed potatoes and green beans as your sides.

This one is Gluten Free. Try this one on a night where you want to make dinner but you just don't feel like being in the kitchen for more than 10 minutes prepping. You'll love it and will appreciate the simplicity of this meal!

Enjoy!

Ingredients

  • 4 boneless, skinless chicken breasts
  • 1/2 cup Dijon mustard
  • 1/4 cup maple syrup
  • 1 tablespoon red wine vinegar
  • Salt & pepper
  • Fresh Rosemary


Directions

  • Preheat oven to 425 degrees.
  • In a small bowl, mix together mustard, syrup, and vinegar.
  • Place chicken breasts into 9×13 greased baking dish. It's REALLY important that your pan is well greased so it doesn't stain! 
  • Season the chicken with salt & pepper. 
  • Pour mustard mixture over chicken. Make sure each breast is coated.

  • Bake for about 30-40 minutes.
  • Season with chopped rosemary.


Monday, September 8, 2014

Garlic Ginger Shrimp Stir Fry

I tried a YUMMY new shrimp recipe tonight! My husband is out of town for work travel (he hates seafood) so I get to try new seafood recipes every once in awhile! This one came from the Steamy Kitchen and reminded me of a PF Chang's recipe I love so much! This one was really easy to make...almost too easy to make.

This one is Gluten free (make sure your soy sauce is Gluten free and read your label on the oyster sauce). I paired this with brown rice, threw in some sugar snap peas and broccoli and it turned out great!

Enjoy!


Ingredients:


  • 2 tablespoons oyster sauce
  • 1 tablespoons soy sauce
  • Handful fresh cilantro, chopped
  • 2 teaspoons cornstarch
  • 1/2 pound shrimp, peeled and deveined (tails left intact optional)
  • 1 tablespoon olive oil, divided
  • 5 stalks green onion, chopped (white and light green parts)
  • 2 garlic cloves, finely minced
  • 2 teaspoons fresh ginger, finely minced or grated


Directions:


  • In a small bowl, combine oyster sauce, soy sauce and cilantro and set aside.
  • Pat the shrimp very dry with paper towels. In a medium bowl, add shrimp and cornstarch and toss to coat.
  • In a wok or large saute pan over high heat, add half the olive oil and swirl to coat the bottom of the pan. When the wok is very hot, add the shrimp in a single layer and cook partially until one side is seared brown, about 1 minute. Flip and sear the other side of each shrimp, about one more minute. They don't need to be cooked all the way through yet. Remove them to a plate or bowl and set aside.
  • Turn the heat down to medium and let wok cool off a bit to prevent the aromatics from burning. Add the remaining olive oil and add green onion, garlic and ginger and stir fry for a minute until fragrant.
  • Pour in the sauce mixture and add the shrimp back into the pan. Stir fry for another minute until shrimp is cooked through. 
  • Add your sugar snap peas and broccoli and stir fry for about 3 to 5 minuted.
  • Serve immediately.

Wednesday, July 30, 2014

Slow Cooker Pulled Pork with Bourbon-Peach Barbecue Sauce

I don't cook many pork recipes, but I have a friend who tried this one and said she loved it so I had to try it. Thanks Jillian for sharing this recipe! She found this one at Cooking Light. I'm from the south, so it's really hard to find good barbecue out here where I live so I typically just don't bother. But this recipe is great and it's absolutely worth repeating!

What makes this recipe taste so good is the smoked paprika. Not regular plain ole paprika, but smoked paprika. It really gives it a smoky flavor and it reminded me of my southern barbecue from back home. This one is gluten free (use gluten free soy sauce and make sure your chicken stock is gluten free) and dairy free. Make sure you read all your labels to ensure everything is gluten free if you are going that route! One thing I want to point out is this recipe calls for balsamic vinegar. I love flavored vinegar and I had a peach balsamic vinaigrette on hand, so I used that. Regular balsamic vinaigrette does the trick, but if you have flavored, use it!

I love my crock pot meals, so take advantage of this one! This recipe goes great with baked beans and cole slaw. It's evern really tasty on rolls for a sandwich!!

Nutritional Information is below!


Ingredients
  • 2 teaspoons Spanish smoked paprika
  • 1 1/4 teaspoons kosher salt, divided
  • 1 teaspoon freshly ground black pepper
  • 1 (3 1/2-pound) bone-in pork shoulder roast (Boston butt), trimmed
  • 1/2 cup unsalted chicken stock (such as Swanson) 
  • 1/3 cup balsamic vinegar
  • 1 tsp olive oil
  • 1/3 cup molasses
  • 2 tablespoons lower-sodium soy sauce
  • 1 teaspoon crushed red pepper
  • 1/2 cup peach preserves
  • 2 cups vertically sliced onion 
  • 5 garlic cloves, thinly sliced
  • 1/4 cup bourbon 
  • 2 tablespoons cold water 
  • 2 teaspoons cornstarch


Directions

1. Heat a large skillet over medium-high heat. Combine paprika, 1/2 teaspoon salt, and black pepper; rub evenly over pork.


2. Coat pan with about 1 tsp of olive oil. Add pork to pan; cook 10 minutes, turning to brown on all sides. Place pork in a 6-quart electric slow cooker.


3. Add stock and next 4 ingredients (through crushed red pepper) to skillet; bring to a boil, scraping pan to loosen browned bits. Add preserves, stirring with a whisk.


4. Pour mixture over pork; top with onion and garlic. Cover and cook on LOW 6 1/2 hours or until pork is very tender.


5. Remove pork from pan, reserving liquid; cool slightly. Shred with 2 forks. Remove onion with a slotted spoon; add to pork.

6. Place a large zip-top plastic bag inside a 4-cup glass measuring cup. Pour cooking liquid into bag; let stand 10 minutes (fat will rise to the top). Seal bag; carefully snip off 1 bottom corner of bag. Drain drippings into skillet, stopping before fat layer reaches opening; discard fat.

7. Stir bourbon into drippings; bring to a boil. Cook 10 minutes or until mixture is reduced to about 1 1/2 cups. Combine 2 tablespoons cold water and cornstarch in a small bowl, stirring with a whisk; add cornstarch mixture to sauce, stirring constantly until thickened. Stir in remaining 3/4 teaspoon salt. Drizzle sauce over pork; toss gently to coat.


Nutritional Information
Amount per serving: serving size: about 3 ounces meat and about 2 tablespoons sauce

Calories: 206
Fat: 5.9g
Saturated fat: 2g
Monounsaturated fat: 2.6g
Polyunsaturated fat: 0.7g
Protein: 17g
Carbohydrate: 20g
Fiber: 1g
Cholesterol: 54mg
Iron: 2mg
Sodium: 369mg
Calcium: 41mg

Tuesday, July 8, 2014

Sweet Garlic Chicken

I have such a funny story to go with this recipe post! I received a text tonight from my next door neighbor and she said her husband walked by our house outside and smelled this wonderful smell. He walked back in his house and said, "Amanda must be cooking something really good because even the outside of her house smells fantastic!" Ha Ha! I LOVE IT!

And yes, indeed I was :)

I made this wonderful little dish from myfridgefood.com called Sweet Garlic Chicken. It is really easy to make and is a fast prep. This is a gluten free dish and has 4 easy ingredients: chicken breasts, olive oil, fresh garlic and brown sugar. That's it!

I do want to share that this dish stirred up a lot of conversation on a Facebook post about the 4 Tablespoons of brown sugar this dish calls for. But let me stress that it's only 4 Tablespoons of brown sugar spread over 4 breasts of chicken. That's really not a lot. I dont eat brown sugar every day. As a matter of fact, I rarely eat sugar. But having some sugar in your diet is not a bad thing. If you are diabetic, you may not want to try this dish. But it's a chicken dish and there is nothing wrong or unhealthy about eating chicken with about 1 Tablespoon of brown sugar on it per piece.

Ok off my soap box:)

Below is the recipe and I hope you love it! Oh! And my neighbor text me about 2 hours later and said they saw my post on Facebook for this recipe (and they loved how this smelled outside my house) and decided to try this chicken dish tonight.  They told me they loved it and it will be a repeat in their house! So, yes it's worth repeating!

Enjoy!

Ingredients:

  • 4 boneless skinless chicken breasts
  • 4 garlic cloves, minced
  • 4 tablespoons brown sugar
  • 1 tablespoon olive oil


Directions:


  • Preheat oven to 450°F.  Line a Pyrex baking dish or cookie sheet with aluminum foil and lightly coat with cooking spray or lightly brush with oil.

  • In small sauté pan, sauté garlic with the oil until tender.

  • Remove from heat and stir in brown sugar. Add salt and pepper as desired.

  • Place chicken breasts in a prepared baking dish and cover with the garlic and brown sugar mixture. NOTE: Your brown sugar mixture should be the consistency of a rub and not a liquid.

  • Cook uncovered for about 30 to 40 minutes until your chicken is done all the way through. You are then ready to serve! 


Tuesday, July 1, 2014

Grilled Green Beans

If you guys have a Facebook account, you have probably seen this recipe floating around out there. Everyone claims this recipe is super simple and tastes great, so of course I just had to try it!

And let me tell you, not only is it simple but it also has a really great taste! This has to be the one of the easiest and most convenient recipes for a side dish that I have posted. It's gluten free and you want to make sure you use fresh green beans! I used fresh lemon juice and Parmesan cheese too. This one is a keeper and a great side dish for summer meals!

Enjoy!

Ingredients:

  • 8 oz green beans
  • 1 tbsp lemon juice
  • 1 tbsp extra virgin olive oil
  • 1 tsp garlic powder
  • 1/2 tsp kosher salt (optional)
  • pepper to taste
  • Parmesan cheese

Directions:

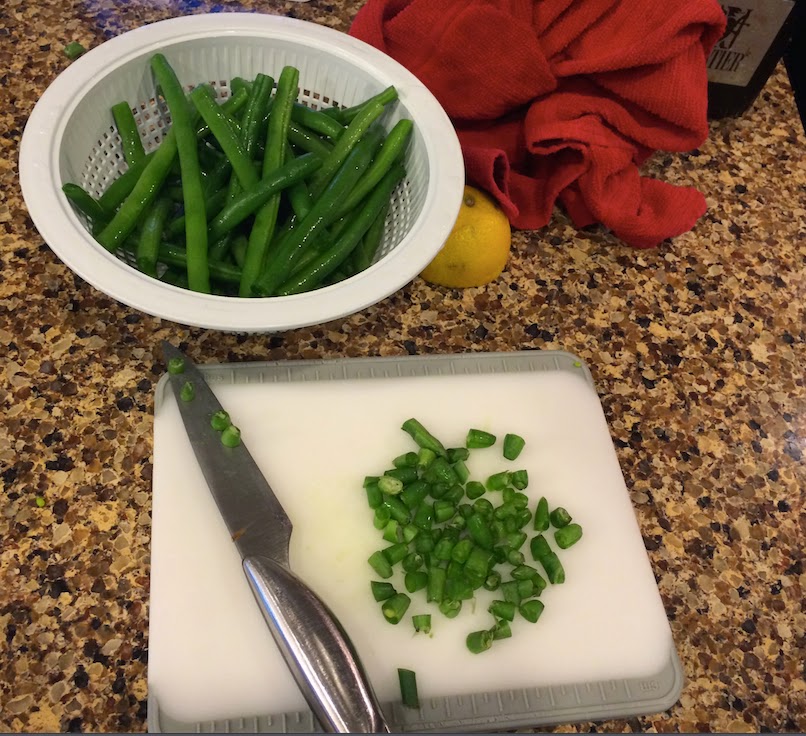
1. Cut the ends off your fresh green beans and wash thoroughly.


2. Mix all ingredients except the Parmesan cheese in a large Ziploc bag. Let flavors marinate for 10 minutes or so.


3. Put on a grill over medium heat. Turn green beans frequently until crisp tender (about 10 minutes). (Use one of those special grill skillets or a cast iron skillet if you are worried about losing beans through the cracks. I used a grilling basket).


4. Remove beans from heat, sprinkle with Parmesan cheese and you are ready to serve. Easy!

Wednesday, June 25, 2014

Greek Marinated Chicken

I found a fabulous chicken recipe this past weekend and I just have to share it! This one is a Greek Marinated Chicken made with chicken thighs and legs. This one comes from "Budget Bytes". Their website is: http://www.budgetbytes.com/2013/06/greek-marinated-chicken/ and I can appreciate the information they place on the site. They give a lot of information about balancing your budget and still having the ability to eat well. That's right up my alley! Check out their site for some great budget information with your grocery list!

This Greek Marinated Chicken recipe grabbed my attention because they posted a picture with the chicken marinating in a white creamy sauce. When I looked at the ingredients, I saw it was made from plain Greek yogurt! YEAH for a healthy marinade high in protein!

This one is really easy to make. You do need to let your chicken marinate for 30 minutes, but this one is gluten free and can be baked in the oven or grilled. Step by step instructions are listed below. This one has a wonderful garlic and lemon taste and was a huge hit tonight in my house! This will easily become one of your family's favorites!

Ingredients:

  • 1 cup plain Greek yogurt
  • 2 Tablespoons extra virgin olive oil
  • 4 cloves of garlic, minced
  • 1/2 tablespoon dried oregano
  • 1 medium lemon
  • 1/2 teaspoon salt
  • 1/4 teaspoon pepper
  • 1/4 cup fresh parsley
  • 4lbs chicken pieces (I chose thighs and legs)
Directions:
  • To make the marinade, combine the yogurt, olive oil, minced garlic, oregano, salt and pepper in a bowl.
  • Use a cheese grater or zester to scrape a thin later of lemon zest from the lemon skin into the bowl.
  • Add the the juice from half the lemon. Stir until the ingredients are well combined.
  • Clean and then chop about 1/4 cup of fresh parsley and add to the bowl and mix well with the marinade.

  • Grab a gallon sized zip top bag and add the chicken pieces and marinade to the bag. Move the chicken around to ensure each piece is well coated.

  • Refrigerate the bag for about 30 minutes.
  • After marinating, you can choose to grill the chicken or bake in the oven. If you bake in the oven, preheat oven to 375 and bake for about 40 to 60 minutes to ensure done.
  • I chose to grill the chicken and grilled for a total of 35 minutes.


  • Ensure your chicken is cooked fully through and it is then ready to serve.

  •                                   


    Sunday, June 15, 2014

    French Toast

    This recipe is one of my husband's favorites. He only gets it 2 times a year...Father's Day and his birthday! So he got it today as it is Father's Day! Let's be honest though...it's not good for you but it tastes absolutely amazing! I am a health freak who constantly eats well, but you have to enjoy life's simple pleasures every once in awhile :) I am a believer in a cheat meal!!

    I'm claiming this recipe as my own, only because I have altered it so much. It originally came from Better Homes and Garden...but my version is better (sorry, Better Homes).

    This is not gluten free; however, I have made this with gluten free bread and it tastes pretty good...so feel free to sub out your bread if you are gluten free.

    Ingredients:
    • 4 beaten eggs
    • 1 cup milk
    • 2 Tablespoons sugar
    • 2 teaspoons vanilla
    • 1/2 teaspoon ground cinnamon
    • 1/4 teaspoon ground nutmeg
    • 2 Tablespoons butter
    • Maple Syrup
    • 8 slices Texas Toast
    Directions:
    • Pre-heat over to 350.
    • In a small and shallow bowl, beat together eggs, milk, sugar, vanilla, cinnamon, nutmeg.
    • Cut your slices of Texas Toast so you have 3 columns.

    • Dip bread slices quickly on both sides. You want to ensure both sides are covered, but not soaked.

    • In a skillet, melt your 2 tablespoons of butter over medium heat.
    • Add half the bread slices and cook until the first side is lightly browned.
    • Turn over and cook until the other side is browned.
    • Repeat with remaining bread slices.

    • Once all the bread slices are browned, place them on a cookie sheet and place in the oven for 10 minutes. The goal is to get these slightly crispy. This is what makes this recipe so good!
    • Remove and add butter and syrup.


    Sunday, June 8, 2014

    Homemade Guacamole

    I have been told that I make AMAZING guacamole. I typically just throw my ingredients in without measuring, but I have had so many requests to post this recipe that I actually sat down and wrote out the ingredients and measurements. I don't like overly creamy guacamole...I like some small avocado chunks in my version, so just FYI.

    This recipe is super easy and fast to make. I think people should really strive to make their own fresh guacamole instead of buying store bought. I try my hardest to use the freshest of ingredients. There is just no comparison in taste. This recipe is Gluten free and goes great with veggies if you are trying to stay away from chips. But I eat it with chips and veggies :)

    Just a note when picking out your avocados, make sure that when you gently press them they are soft. You do not want firm avocados when making guacamole.

    With summer now in full swing, this recipe is a HUGE winner in my house and in our neighborhood for all my friends! I make at least 3 batches for our summer parties!

    Ingredients:
    • 8 fresh avocados
    • 4 limes
    • 5 tablespoons chopped cilantro
    • 1 Tablespoon finely chopped onion - optional (white or red is fine. Using a red onion will give it more of an onion taste)
    • 1 chopped garlic clove
    • 2 tablespoons shredded cheese (I use a Monterey and Mild Cheddar mix)
    • 1 teaspoon garlic salt
    Directions:
    • Cut your avocados horizontally. Remove the seed, spoon out the avocado and put into a mixing bowl.
                                
    •  Squeeze as much of the juice out of your 4 limes as you can into the mixing bowl. I use a citrus press and it works wonders!
                                
    • Wash and then chop your fresh cilantro and place into the mixing bowl. Do the same with your onion and garlic clove.
                                
    • Sprinkle your cheese in the mixing bowl.
    • Add 1 teaspoon of garlic salt.
    • I take a potato smasher and smash all my ingredients together in the mixing bowl. I then stir until it's very well blended. Feel free to add a bit more garlic salt for taste if you feel it needs more.
    • Serve with your favorite chips, veggies or with any Mexican dish.


    Sunday, May 11, 2014

    Summer Salmon and Strawberry Salad with White Wine Dressing

    This beautiful salad is all mine :) I created this one some time ago and it's one of my favorites. This one is perfect to eat as a lunch dish and is low in carbs and high in protein. This one is perfect for summer and since it's warming up, I decided to make this one today and have it for lunch. It's gluten free and fills you up to where you feel satisfied, but not overly full. The salad dressing is homemade, as well. NOTE: This dressing is best if made before hand and chilled before serving.

    If you love to try different salads, you should try this one. This one will easily become one of your favorites! And it's really easy to make. The recipe below is for 1 serving.

    Ingredients for Salad:
    • 2 Cups Spring Salad Mix
    • 4 Strawberries quartered
    • 3 Tablespoons Chopped Walnuts
    • 2 Tablespoons Dried Cranberries
    • 2 Tablespoons Chopped Celery
    • 4 oz Fresh Salmon
    • 1 Lemon Wedge
    • 1/4 tsp Dry Dill
    • Salt an Pepper for taste
    Ingredients for Dressing:
    • 1-1/2 c. canola oil
    • 1 c. wine vinegar
    • 10 Tablespoons Sugar
    • 1 Tablespoon Salt
    • 2 Cloves Garlic, crushed

    Directions:
    • Take the strawberries, salad mix, walnuts, cranberries, and celery and place in a salad bowl.
    • Heat over to 350. Take your salmon and season it with dill, salt and pepper and lemon juice.
    • Bake for 30 minutes until done.
    • Once the salmon is done, place on top of the salad.
    • You are now ready to add the dressing. Take all ingredients listed for the dressing and shake vigorously until well combined. Add 1 to 2 Tablespoons of the dressing to the salmon salad.
    NOTE: The dressing should be chilled before serving on top of the salad. It tastes better if it is chilled.


    BLOG DESIGN BY DESIGNER BLOGS